
Install Hardwood Flooring Like A Professional: Everything You Need To Know
Wood floors are popular with homeowners because of their elegant look, combined with how easy they are to clean and maintain. But, the thought of a hardwood floor installation can be daunting, especially for a DIY novice. That’s where this helpful guide comes into play.
The fact is, you don’t have to be a professional contractor to install new wood floors! Start by following along with these helpful tips (straight from the hardwood flooring source itself – Baird Brothers!), and with a little research and planning, you’ll be on your way to completing your flooring project in no time.
Prepping for the Installation of Wood Flooring
Before you start the installation process, you need to choose your hardwood flooring! Baird Brothers Fine Hardwoods has a variety of solid wood options to fit any budget or style, and our knowledgeable staff will help you choose between species, character grades, and plank sizes to get the look of your dreams (whatever that may be)!
Engineered vs. Solid Hardwood Flooring
It’s important to note that hardwood flooring can be limited by various factors, including the types of surfaces it can be installed on. In instances where traditional hardwood flooring may not be the best fit, many customers opt to install engineered hardwood flooring – a much higher-end option than laminate flooring.
Engineered flooring from Baird Brothers Fine Hardwoods utilizes a Baltic birch core, which increases the floor’s ability to withstand humidity and allows it to be installed on any surface (not just plywood subfloor). It’s available in a variety of wood species, including red oak, hard maple, cherry, hickory, ash, walnut, white oak, quarter sawn red oak, and quarter sawn white oak.
Next, measure the space(s) and take into account every aspect of the room(s). Be sure to also consider the height of the flooring products ordered – traditional hardwood flooring from Baird Brothers has an overall thickness of 3/4”. Engineered flooring, by comparison, has an overall thickness of 5/8”. Remember too, if you chose a prefinished flooring product, after installation, there will be no need for sanding or staining, and there will be no drying time.
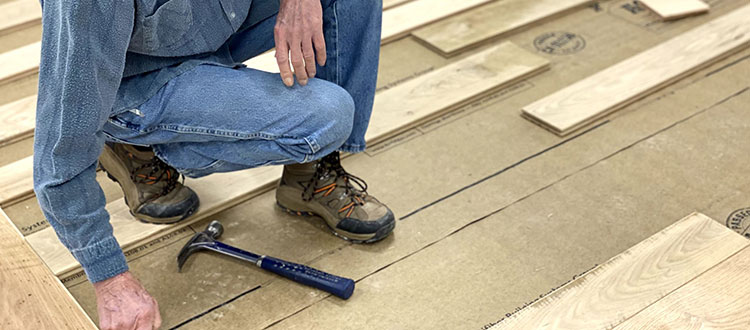
Hardwood Flooring Installation Tips
Home improvement doesn’t have to be scary. In fact, installing new hardwood floors can be a seamless process as long as you prepare. Here are some key tips for installing Baird Brothers’ hardwood or engineered flooring. Be sure to check out our Build It With Baird episode on hardwood flooring installation, too!
Tools Needed for Wood Flooring Install
- Pneumatic or Manual Flooring Nailer
- Compressor
- Mallet
- Finish Nailer
- Table Saw/Jig Saw
- Tape Measurer
- Chalk Line
- Wood Putty
- Miter Saw
1. Do the necessary prep work.
Remove any existing baseboard and old flooring. If installing on a wood subfloor, be sure to use a red rosin paper or Aquabar underlayment product to act as a vapor barrier and reduce wear.
Make sure that the interior temperature and humidity are at the levels they will be when the space is lived in before having your flooring product delivered. Then, allow your new flooring to acclimate to your environment before installing (usually between 3 to 5 days).
Wood flooring needs to acclimate because it absorbs moisture in the air. When wood has the opportunity to rest in its new environment, it collects this moisture before installation. Installing hardwood floors that have not had this time to acclimate can lead to wood shrinkage or expansion that can cause your floor to become uneven. Following the manufacturer’s instructions is imperative for setting your project up for success!
2. Plan your starting point.
The first boards are the hardest. Plan your starting point by taking features like fireplaces, stairs, and transitions into account. Often, the starting wall is the longest uninterrupted wall in the room, because the longest wall provides a natural flow to the process (and the final look will accent the length of the room). Additionally, if you ask most professionals, they will also suggest starting installation along an exterior wall, because it’s more likely to be square.
Remember to leave a ¾” expansion gap around the perimeter of your room – use spacers if you need to. (All hardwood flooring will naturally absorb moisture and expand and contract throughout the year.) Snap parallel lines throughout the room(s) to keep the flooring straight when installing, and run boards perpendicular to floor joists for strength.
3. Rack the boards for easy installation.
Racking the boards allows for variation in the flooring boards’ color and length. Mix flooring from various packages and then lay them out in the order you would like the boards installed, remembering to stagger the end joints.
4. Face-nail the first few boards in place.
Pneumatic and manual flooring nailers are often difficult to use near walls because of their size. So, when installing the first row, face-nail the boards in place. Then countersink the nails, fill holes with wood putty, and blind nail (nail at a 45-degree angle) through the board’s tongue into the subfloor. Repeat the blind-nail process in each row until a flooring nailer can be used.
5. Lock the boards in place before nailing through the tongue.
To lock each row of boards in place with the preceding rows, tap the tongue of the board with a rubber mallet, remembering to stagger the end seam joints throughout the room. Then nail every 6-10 inches, depending on the width of the boards. Pro Tip: Use a tapping block to avoid damaging the boards when fitting them in place.
6. Finish the installation by measuring the gap, nailing by hand, and replacing trim.
When you get to the point of installing the last couple rows, nail down the boards in place by hand. (Nail guns can create uneven nail holes or shift the planks.) For the last row, measure the distance between the second to last row and the wall, cut pieces to fit (factoring in the ¾” expansion gap), and face-nail in place. Again, countersink the nails and fill all holes with wood putty. Then, replace any baseboard moulding, shoe moulding and trim that were removed before the flooring installation.
7. Admire your finished floor!
Installing that beautiful wood flooring doesn’t have to be scary! No matter the square footage of your room, upgrading to solid wood flooring is an easily attainable home improvement project.
Get the Best New Floor – Get Baird Brothers
Now that you know how to install hardwood flooring like a professional, it’s time to choose a trusted retailer to get the high-quality hardwood flooring you’ve been searching for!
At Baird Brothers Fine Hardwoods, we pride ourselves on creating the finest hardwoods that professional installers and DIYers alike can appreciate. But, don’t just stop with those gorgeous hardwood floors! Choose from our endless selection of hardwood home improvement possibilities: shiplap walls, interior doors, accent mouldings, and more!
Check out our site to see the endless options and make your dream home a reality. We look forward to working with you soon!

