
Tips & Tricks to Install Shiplap Walls With Builder Jon Ulicney
Steve Stack:
Brought to you direct from Studio 3B at Baird Brothers Fine Hardwoods, American Hardwood Advisor is your source for trends, tips, and insights into how the building industry has evolved.
Join me, Steve Stack, along with guest builders and industry leaders, as we talk shop and go in-depth on what it takes to be the best of the best.
Dive into topics like architecture, industry trends, project plans, historical tools, tricks of the trade, and life lessons from more than six decades of experience in the hardwood lumber business.
Talking Shiplap Accent Wall Installs With a Home Improvement Expert
Steve Stack:
Hello from Studio 3B here at Baird Brothers Fine Hardwoods in Canfield, Ohio. I’m your host, Steve Stack, and I’m here with a very good friend of ours, Mr. Jon Ulicney – local builder and contractor. He’s one of those guys where if you want it done right, get a hold of Jon. What are you thinking, Jonny? Here we are again.
Jon Ulicney:
Yeah, we are again.
Steve Stack:
Who knew while building this thing out that we were going to have this many conversations, huh?
Jon Ulicney:
It surprised me. I don’t think we had this many when we were building!
Steve Stack:
You know what? We had great conversations in the process of the buildout. For these conversations, though, we’re just sitting down and talking about stuff we’ve talked about for the last 30 years. And we’re going to share that information with our viewers and hopefully, who knows? We might say something and they can actually put to use.
Jon Ulicney:
I hope so.
Steve Stack:
Okay. So, today we’re going to be talking about a couple products that we used here at Studio 3B. We had discussion on it and we’ve introduced a very popular product right now and used it here in two of our ceiling treatments. That’s the prime shiplap paneling product, right?
Jon Ulicney:
Right.
Steve Stack:
Important to note: we stock it as a primed material, right? For painting purposes. But it’s available in all the hardwood species. You want that splash on a feature wall, on an accent wall, whether it be a living room, a fireplace wall, a master bedroom, a stairway wall going down, it’s available in oak to maple, to poplar, cherry, whatever, whatever. That being said, the shiplap family of products is a relatively installer-friendly product. Along with that, we’ve introduced a great product like behind us here at the studio, this is the live sawn character grade white oak shiplap paneling.
Wood Paneling with a Natural Look or Beautiful Paint Colors
Steve Stack:
On our walls, we just put a nice satin clear coat finish on it, just to keep it neutral, natural and warm. Live sawn versus flat sawn, versus quarter sawn, three distinct sawing techniques that the sawyer will address a log from. The neat thing about the live sawn, and we talked about it when you were doing the install here, the live sawn generates the flat sawn lumber, it generates the quarter sawn lumber, and it generates some of the rift sawn lumber. So, it really gives a varying appearance. It’s a great product. This nickel gap siding is different from our shiplap, how so?
Jon Ulicney:
Nailing. The great thing about nickel gap is that you see no nails, there’s no nails to feel. It just looks like one flat wall to me, and it goes together very easily.
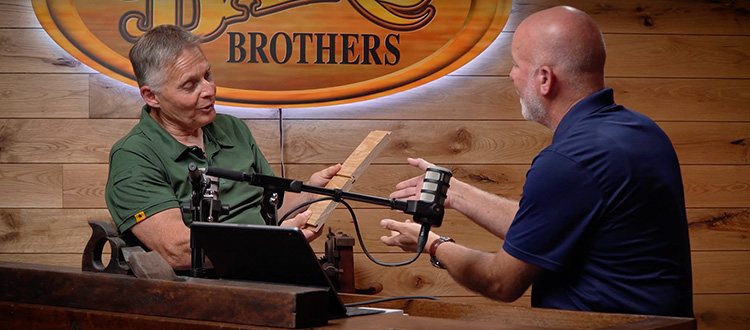
Steve Stack:
So, when I try to describe the nickel gap application versus the shiplap installation, and I have a couple little helper pieces here. A shiplap is no more than two wood plank boards being milled with a shiplap milling design. So, one board actually laps over the other. But in doing so, they never completely interlock. So this requires what type of nailing, Jon?
Jon Ulicney:
Face nail on this particular one. See on this one, you can hide the nail on the top, but on the bottom you need to have this so it’s fastened, so it doesn’t twist off the wall. So, you always have one nail that you have to deal with here.
Steve Stack:
You’re going to be dealing with nail holes, but the design rage right now is painting the shiplap.
Jon Ulicney:
Correct.
Steve Stack:
So, it’s not a big deal.
Jon Ulicney:
It’s not an issue at all.
Steve Stack:
Fill the nail hole, scuff, sand it, paint, the nail hole disappears.
Jon Ulicney:
It’s just like going over the base border casings, it’s the same thing.
Steve Stack:
Exactly. Good comparison, Jon. Versus our nickel gap, I’ll call it a modified tongue and groove.
Jon Ulicney:
Right. That’s exactly what it is, right.
Steve Stack:
Okay. We do have the two boards and it creates a gap very similar to the shiplap, but it’s not as pronounced. It’s a more delicate gap. Sometimes referred to as “nickel gap” because its roughly the thickness of a nickel. So when it goes together, there is actually a tongue and groove assembly that joins the two boards. From an installation standpoint, how does that one go on the wall?
Jon Ulicney:
Easily. When we do this, we’ll nail the bottom where you can nail it. We can go right down through the top of the tongue here and go into the wall. Then, just like that, everything’s nailed, so there’s no nails visible.
Steve Stack:
No face nailing required.
Jon Ulicney:
And this tongue then holds…
Steve Stack:
Because the two boards engage each other, very similar to a hardwood flooring (which there’s no face nailing involved in hardwood flooring installation), you have the added stability and strength of a modified tongue and groove.
Jon Ulicney:
Right. It’s just a great way to go. I love this. And actually, I think you probably could make a shiplap out of that same technique.
Steve Stack:
It’s a little more lumber.
Jon Ulicney:
Yeah. A little more lumber. Yeah. But, it’s a great way to go, especially with natural finishes.
Steve Stack:
Yeah. With your natural finishes, you don’t have to worry about color matching putty and face nailing. Nice way to go on that.
So, that’s two of the products that we used here in the studio. I know it’s one of your favorites: one of the ceiling areas where we accented that with a very old profile, sometimes referred to as beadboard, sometimes referred to as Victorian tongue and groove beaded paneling. It’s been around a long time.
Now this, again, is similar to our nickel gap white oak live sawn. This lends itself closer to a tongue and groove flooring product, in that the tongue and groove, both through installation and the joining technique of the product, it’s a true tongue and groove. So, this piece being nailed/affixed to a wall, a ceiling, and then nailed through the tongue is just like hardwood flooring. The next member coming in, engaging the tongue with the groove, and the nails being completely concealed.
Jon Ulicney:
Right. There’s no nails at all on this that you’ll see.
Steve Stack:
On this. When you get to the perimeter of the room, just like our ceiling, you’re typically going to finish off that perimeter with some type of accent mold, whether it be something as simple as a raft or mold, or something as complicated as how you dressed that ceiling up with a crown assembly, and so forth. Even those perimeter face nails, they’re going to disappear.
So, three different products, three different looks and some installation options, as far as what project you’re going to use it on and why you’re going to use it on that product. We also did the ceiling right above us.
Jon Ulicney:
Right, with a shiplap.
Steve Stack:
This is another variation of our shiplap boards, a little bit thinner material, not quite so heavy of the shiplap joint, but again, requiring the face nail application, right? But a nice product, not quite so big and bold as the six inch that we used over in the large coffered ceiling. Our studio here, if I remember correctly, is 12’ by 12’ and it looks very comfortable up on that ceiling.
Jon Ulicney:
Yes. This is a great product to put up. It’s not too heavy, not too bulky.
White Shiplap and “Backsplash” Tips
Steve Stack:
Shiplap doesn’t have to be white. We added a little color to this and it really warmed that ceiling up. So the beauty of wood, whether you’re staining and varnishing or whether you’re painting, you can dial that into your decorating scheme to whatever your color palette demands, and accomplish it with a natural wood product.
So, any tips or tricks of the trade on that? I remember popping in here one afternoon and you were installing this character grade white oak live sawn, and you were doing something a little bit different at your butt joints. I snagged a piece, alright? We both know what that is and we can use this, and use some of this, but you actually used black tar paper too. Tell us about it.
Jon Ulicney:
When you have a butt joint, you’re still going to get some movement. If they would open up a little bit, you don’t want to see the drywall behind it. So, we use something that’s similar to the color and if they open up even a little, you won’t see a background and it makes them look real nice.
Steve Stack:
You still have that same background.
Jon Ulicney:
Same background.
Steve Stack:
That’s cheating!
Jon Ulicney:
No, it’s not. We used to just use paint, too. We would paint, but the paper’s a lot easier.
Steve Stack:
You used it at the butt joints. Then, if we felt that there was a knothole that was suspect…
Jon Ulicney:
It was behind it, too. Yeah.
Steve Stack:
…You take and put that right behind that knothole prior to nailing the board fast.
So, you look through and you don’t see the stark white wall behind it, right? That’s a great tip, Jon. So in all of these products, whether it be the cherry beadboard wainscot, ceiling, or the shiplap ceilings and either width or the wall product, the white oak wall product. In my mind, I’m thinking we use some of the same installation practices as hardwood floor, and you know where I’m going with expansion and contraction. Talk to us a minute about that.
Jon Ulicney:
Same thing as the hardwood: wood’s always going to move. We try to allow for expansion and contraction, but a lot of it comes back to the homeowners. They really need to make sure that the humidity’s staying the same. If they see some movement, they have to do some research.
Call Baird Brothers and say, “My wood looks like it’s moving.” They’ll check it out for you and they’ll tell you if you have too much humidity in the house or if you don’t have enough, and that’s the real key. This is a great DIY project with easy installation. It’s pretty simple, just stacking wood on top of each other going up.
Steve Stack:
I’m glad you said that, because if people nose around and do a little research on some of the videos that we’ve done in the past, I don’t recall how long ago it’s been now, but we did just that. We took a partner down in New Brighton, Pennsylvania, and she wanted to do a shiplap wall project. So, we went down and we gave her a little guidance and she knocked it out through some guidance, through some preparation on her point, you know who I’m talking about, our friend Christy at Oak Hill Millworks.
Jon Ulicney:
Yeah. Oh, yes.
Steve Stack:
We went down in a day’s time and did a stairway wall trimmed out, holes puttied, ready for paint. I got to give her kudos, man. She grabbed that 16 gauge nail gun and she went to work. So it is a very doable project for the homeowner.
And before we talk about some of the tools that you used and some of the tools that she used on that job site, or her home that day, I just want to make the point that shiplap has become a decorating phenomenon over the course of the last five, six, seven, eight years. There was a couple down in Texas that became very famous in their usage of shiplap products, but we use it as a decorating element now.
Back in the day, that was a critical structural element in the construction of homes, correct?
Jon Ulicney:
Yes.
Steve Stack:
You know building way better than I know building, but that was a sub paneling on the wall. You pull the strength of the structure, they get some pretty nasty weather down there in Texas, and they built those houses to withstand that. And they did it through a lot of real shiplap wood paneling on the interior of the home, to strengthen those walls and so forth.
Jon Ulicney:
Yes. Keep it from racking and moving.
A Home Decor Makeover With Shiplap Paneling
Steve Stack:
So all of a sudden, we’re remodeling houses in Texas and take the wall covering off, “Oh, look at that old shiplap siding. Let’s put some whitewash paint on it.” Now we have a decorating phenomenon years later. And it is, it’s very nice. It’s a good look. It can be modern. It can be farmhouse style, you can go the whole gamut with it. With the right color, it can become traditional.
We’ve done some homes, I recall one home up in New Canaan in Connecticut, the office was done in it and it was painted a deep sea blue like a midnight blue, and it was stunning and it was in a home, formal office setting, and it was beautiful. So again, the flexibility as far as decorating schemes that the wood allows you to do through staining techniques or through painting techniques, it’s endless.
Jon Ulicney:
Just going in, and we do a lot of shiplap accent walls, where we just go in and do one wall with it and that’s it. We’ll walk out of the room and they’ll either paint it or leave it natural.
Steve Stack:
That’s all it takes to set that room off a little bit. Take it to that next level and that’s your complimentary color for the rest of the colors in the room. And it looks nice. It really looks nice.
Jon Ulicney:
I personally like it. I think it just makes a difference.
Tools You Need for a DIY Shiplap Wall
Steve Stack:
Very much so. But going back to the installation of all of the products, all of the installation techniques are pretty much the same, and it’s going to require the same tools. You’re going to need a level. You’re going to need a chalk line. What else are you going to need, Jon?
Jon Ulicney:
Chalk line, a way to cut the material, usually a miter saw and box is preferable.
Steve Stack:
You could get by with a circular saw, but a miter box is much more precise.
Jon Ulicney:
If you don’t have all the tools, you can always get by. Basically, having that level, having the chalk line, a good ruler, and make sure you look at your work as you’re doing it, that’s the key thing. When you put a piece on, turn around and look at it and make sure it’s right. So many people go, “Oh, I didn’t see that,” but the main thing is to always look at what you’re doing.
Steve Stack:
And I know there’s little tips and tricks, and you’re not going to share them with us today, just because of time constraints.
Jon Ulicney:
I think there’s a video. We did a video tutorial with it.
Steve Stack:
We did. We did.
Jon Ulicney:
So that’s more than enough.
Steve Stack:
People can look at that, but if you’re dealing with an existing wall surface, a fixer upper, or a new construction wall surface, they might not be the same from end to end. You might have to, we call it “cheat” a little bit to gain one end to the other. Sacrificing a little bit of the level line, but not all on one board, you do it over the course of five or six boards. You get caught up so when you get to the top, you still have a nice full piece-
Jon Ulicney:
That’s a finish.
Steve Stack:
… that matches the ceiling and finishes off nice, right?
Jon Ulicney:
Yes.
Steve Stack:
And I know you’ve got a pocket full of those tips, but like I say, if they want to talk to you, I’ll let them call you.
Jon Ulicney:
Okay. That sounds good.
Quick and Easy Installation to Improve Your Small Space
Steve Stack:
Now, you did this wall. I don’t know, what did you have in these two walls, three quarters of a day?
Jon Ulicney:
I would say the filming was three quarters, but it would normally take us about half a day. We would figure three hours, maybe.
Steve Stack:
One thing I remember, and the same holds true for Christy on her shiplap installation project, you guys both did the same thing. You had boards prepped for length. So, Jon, you and your helper made this project look easy and it was, but because why?
Jon Ulicney:
Preparation. Being ready for it, understanding what I was going to do, where I was going with the job. Try to visualize what you’re going to do and make it simple. In other words, if I was doing this wall, I’m going to put the boards across, they’re straight and I’m just going to stack them and it’s that simple. And I just lay it out and go. I think any DIY-er would do the same thing. You would just look at it, and it’s not such a bad job. Let’s just do it.
Steve Stack:
No, no, it is. It’s very achievable. Very achievable.
Jon Ulicney:
Prepping is the key, make sure the wall’s clean, there are no obstructions in it and just start working your way up.
Steve Stack:
So the old “measure twice, cut once.”
Jon Ulicney:
Right. Yeah. I measure three times because I messed up a couple times!
Steve Stack:
I know you used two things here that we’ll touch on real quick. You used a laser leveling system. So that established in this L-shaped wall assembly here, that established points at each end and in the corner. So now you had connected dots and you were good across the body of these walls. Then you implemented an old tool, not only used by exterior siders, masons, but finished carpenters also, commonly referred to as a story stick or a story pole, right?
Jon Ulicney:
Correct. Yes. I know that the siding, for example, might be six inches apart. So, I make a story pole. I just take a thin piece of wood, I mark six, 12, and I just go right up using a six inch increment. Then I take my story pull and I put it where my laser mark was and I mark it up. I don’t use my ruler, this way I can’t make a mistake. I just put my marks on the wall.
Steve Stack:
You’ve misread a ruler once or twice?
Jon Ulicney:
Once. One time.
Steve Stack:
One time.
Jon Ulicney:
Yeah. One time I think.
Steve Stack:
That’s good. Okay. I’m surprised to even hear that, really, Jon.
Jon Ulicney:
But it takes the mistakes out of things. You try to keep it simple, just like when the three of us, my helper, we were working on these ceilings up there. You notice once we didn’t use a ruler all that much, we had little gauges and we used those.
Steve Stack:
No, and it’s that hidden helper. You create your story stick, and then you use that to transfer those marks to, in our case, the end of each wall run and to the corners. And it was true the whole way up. It’s that uniformity, that consistency, and when you’re done and you step back, the lines are nice and level and parallel. And aesthetically, it looks beautifully.
So, okay. There’s another good one for the folks to use when they’re doing their project at home. I know in this case it was a new build out. In the case of an existing home, you might have to remove the baseboard.
Jon Ulicney:
Right. I would remove the baseboard.
Steve Stack:
Right. If there’s door and window casing involved, you may have to remove that because all of the products, with the exception of the little shiplap that we have up over top, that’s all of five eighths or three quarter inch product. So it won’t sit on the baseboard, it’ll overhang the baseboard. It will not look right. When you come to adjoining vertical door and window casings and it butts to it, it will either completely bury the depth of that door and window casing. So we remove that, and then if it’s five eighths inch thick, or if it’s three quarter inch thick, we’ll go back around that window and build it out the same thickness, right?
Jon Ulicney:
Correct. Yes.
Steve Stack:
So when our new paneling material comes up, it’s flush to what we call that new extension jam, right? Then, we reapply that door or window casing, and now it still stands proud, ahead of the wall paneling surface.
Jon Ulicney:
Correct. It looks just like it’s supposed to look that way.
Steve Stack:
Exactly. Exactly. It’s a very simple operation, you know yourself. What do we do? We take a flat bar and we respect the trim and we gingerly take that off, right?
Jon Ulicney:
Take that off. Correct.
Steve Stack:
And if done correctly, it goes right back up.
Jon Ulicney:
It’s already cut for you, just put it right back up and you’re in good shape.
Steve Stack:
Yeah. Yeah. It really leaves both elements, the trim and the wall system, compliment one another. Yeah. So, there’s a lot of tips and tricks and we’ve talked about the dark paper versus the light paper, so we don’t see any background in the case of any voids with the live sawn material. You did something a little bit different, and it might not be DIY friendly, but you used a little bit of a blind corner slip joint in our inside corner. It turned out beautiful, through that dado technique.
Jon Ulicney:
Yes. Just a simple router and dado.
Steve Stack:
Okay. So, if I recall correctly, you were probably three sixteenths deep, maybe a quarter inch deep, on one of the boards coming towards the corner. We want to take a minimal approach and put maybe a small piece of flat stock in that corner.
Jon Ulicney:
Right. You can just put a tiny moulding down and that would do the same thing. If there’s any expansion and contraction, you wouldn’t notice it at all, because the moulding would cover that seam up.
Steve Stack:
But in your installation, it allowed for us to have that uninterrupted horizontal line down the wall, through the corner, and out to the other wall. And it’s seamless, it’s seamless. It just keeps living, and it turned out beautiful, Jon. You did a fantastic job on it.
Jon Ulicney:
We try to match the colors up too. If you notice where our knotted boards are, we try to match them up when they go around there, that’s another important thing.
Steve Stack:
Yeah. So that’s a little more of an advanced element, but very achievable.
Jon Ulicney:
It’s achievable, right. If you don’t do the slip joint, you just go to a nice tight joint. You could even use the paper there, or you could put a nice small moulding up is what I’d probably do.
The Shiplap Look as a Focal Point in Your Home
Steve Stack:
Okay. We’ve had the pleasure of working with yourself and other builders in the Mahoning Valley and witnessing some beautiful projects. I know one of our friends over towards New England up in Rhode Island there, Jeff Sweenor (Sweenor Builders) he loves this product. He loves the white oak.
We used the white oak in a project out in Jamestown for a gentleman. He was the architect on the job that was his own home, Mr. Don Powers. Folks can go to our website and go to The Jamestown Project under our This Old House window and view pictures, and Don did just what we discussed earlier. He did a fireplace wall, and then he did a stairway wall, and they boundaried the room, if that makes sense.
Jon Ulicney:
It does make sense to me. Yes.
Steve Stack:
But it was a beautiful design element. So, this stuff’s being used all across the United States. We really feel and believe, like yourself, you mentioned it earlier, one accent wall in a room can be enough. It just sets the tone of the entire room.
Jon Ulicney:
Just changes everything, when you walk in the room.
Steve Stack:
I’m probably partial, but I really feel this corner, this nickel gap siding in the white oak character grade, really warms this corner up. It could have been drywall, but now it has a little bit of character. It shows off mother nature at her best, in my eyes.
So, we’ve covered a lot of ground.
We’ve talked about the wide range of colors you can achieve through staining, through painting. Again, a wall jumps out at me. We did a project recently up on Cape Horn and it was with the builder, Cape Associates, and they have a beautiful natural resource that we don’t enjoy here in northeast Ohio.
We have Lake Erie, but we don’t have the Atlantic ocean. Their interior decorator did an accent wall, to your point. And again, they painted it a sea blue, like a sea foam blue, and it just set that room off. So, you’ve got this seafoam blue wall looking out through a set of windows or sliding glass doors, I don’t recall, and the Atlantic ocean is out there.
And it’s like, are you kidding me? You talk about playing on your surroundings, that’s what this decorator did and it looked beautiful. So, your options are endless. Like we approached this entire project, Jon, through the buildout, we had a gentleman’s agreement: it was going to be fun. And that’s the way homeowners, DIY-ers have to approach it. Give it the forethought. Do the prep work. Do a little bit of investigation and research, and it can be a fun weekend project.
Jon Ulicney:
It is, it’s fun.
Steve Stack:
And when you’re done and you sit back and you see how it changes the room it’s like, “Why didn’t we do this ten years ago?” So again, you did such a fantastic job at Studio 3B here. Man, we appreciate all your efforts that you’re putting in. We appreciate how easy you were to work with, because I know we were getting guidance from 15 different people, and then you and I’d kick it around and say, “Well, do we want to do it this way? Do we want to do it that way?” We did little mockups. We’d take the mouldings, we’d make a mockup of our coffered ceiling treatments and the same, we’d lay a little bit of siding up on the wall. You didn’t buck us through any of that. You said, “Okay, let’s take a look at it.” And then we’d tear back down and-
Jon Ulicney:
Because we had fun.
Steve Stack:
… give another look.
Jon Ulicney:
That’s because we had fun.
Steve Stack:
And we had fun. Friend, I appreciate it.
Jon Ulicney:
Thank you, buddy.
Steve Stack:
It’s been a fun eight months and now this is hard work compared to what we did earlier.
Jon Ulicney:
It is.
Steve Stack:
Hey, until next time. All right. I’ll see you soon.
For all you folks listening, thanks for talking shop with Baird Brothers Fine Hardwoods. If you enjoyed this episode and want to stay up-to-date with our American Hardwood Advisor series, give us a like and subscribe. For more tips, projects and inspiration, check us out on Facebook, Instagram or at www.bairdbrothers.com. Until next time!


